Wednesday, February 27, 2013

Scrappy Chevron Pillow

For this pillow, you will need 1 charm pack, or (8) 5" squares & 20" of white fabric.
Fabric used in this tutorial is Sweetcakes from Riley Blake Designs and can be purchased here.


Select 8 squares for your colored pieces.  I matched them in sets of 2-- (2 red, 2 patterned white, 2 pink, 2 blue).  Each set will make one row.


Cut (32) 2 1/2" squares from your white fabric.


Mark each square diagonally as shown below.


 Subcut each of your 5" patterned squares into (4) 2 1/2" squares.  This should give you (32) 2 1/2" squares.


Pin each patterned square to a white square.


Sew down both sides of the line in a 1/4" seam.  See picture below for illustration.


Using a straight edge, cut between the 2 seams.  Repeat for all 32 squares.


Press seams open.  You should have 64 half square triangle blocks.


Arrange blocks in rows to make a chevron pattern.


Repeat for remaining rows.


 Sew blocks together to make rows.


Then sew rows together to make the pillow front.


I prefer if all my pillows are sewn as slipcovers so they can be easily removed and washed.  I have kids, people.  So at this point, I need to make it fit a standard pillow form size.  (12", 14", 16", etc).  I sewed a 1 1/2" white border to each edge of the pillow front, then trimmed it to a 14 1/2" square.


To make the back of the pillow, cut two 10 x 14 1/2" pieces from your white fabric.
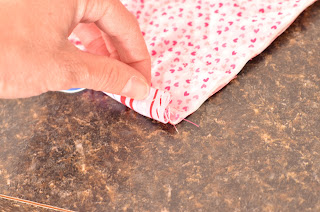
Hem one 14 1/2" side on each piece as shown below.  (1/2" fold, then 1/4" fold)


Pin and stitch down on both pieces.


Pin one piece to pillow front, with right sides together.


Pin second piece down.  This will overlap the first piece by about 4-6 inches.


Stitch in 1/4" seam completely around the edges, backstitching over the overlapped sections for extra reinforcement.


I like a finished edge, so I zigzagged for a clean finish.


Turn inside out and insert your pillow form.


Monday, February 4, 2013

A sale!


Click HERE to shop!!

This sweet little collection sends the winter blues away with its cheery pink and red color palette.
This will be the perfect medium for your valentine craft or sewing project!!
15% off until February 28th!

Friday, December 28, 2012

The Perfect Little Gift

Here's how to make a cute little pocket-size tissue holder.  First, cut the following:
6" x 7 1/4" outer fabric
6" x 7 1/4" lining fabric
6" x 7 1/4" batting 
(2) 6" x 2" for binding


Make a quilt sandwich with outer, lining and batting. 

Baste using pins and quilt in desired pattern.  Don't be deterred by this step.  It can have as little or as much as you would like and can even be in a simple grid pattern. I don't have a quilting foot so I just traced a swirl pattern and then sewed over it.


 Fold binding strips in half lengthwise with wrong sides together.  Press.


Pin raw edges to short edge of quilted piece, catching both layers of bind.


Stitch, using 1/4" seam allowance.  Repeat with 2nd piece of binding on opposite edge.


Pull binding piece around edge and pin in place.


Here you should hand stitch the bind down, but I was too lazy and machine stitched it instead.


At this point, your tissue holder should look like this.  Find and mark the center of long sides with a pin.


Fold bound sides into center and pin into place.  (Outer fabric will be enclosed, and lining will be showing)


Repeat on other long side to resemble picture below.


Stitch across both short sides using 1/4" seam allowance.


Now, here's the tricky part.  Cut out a 3/4" square from white paper.


Place square on corner and trace around using a washable fabric pen.  You don't see the tracing since it is in the inside so I just used a regular pen.  Repeat on all four corners.  Then flip over and trace on all four corners on the other side.  You will have traced the square a total of 8 times.


This picture illustrates the corners I am referring to in the next step.


Pick up tissue holder as shown in photos below.  Press together.  You will then sew a straight line from the corner on the front, to the corner on the back.


Repeat on all four corners.


Clip corners.


Turn inside out.  Ta dah!  You have a perfect little tissue holder.


A sweet friend of mine gave me one of these with lots of refills after my mother was in a car accident.  It really touched me and was just the perfect thing.
Love the fabric used in this tutorial?  You can purchase it here:  www.metroquiltcompany.com